Monday, February 27, 2012
Taking a crafting break.
So....I haven't made any progress on the green gown since my last post.I have no motivation to do anything lately and I don't know what my problem is. I'm not in pain, no fibro flare up to blame. I think I'm getting enough sleep and taking my vitamins. I don't think I'm depressed. I'm in a good mood and all but when I think about projects that I could be working on I have no desire to do them. ScrapFreak has an online crop in progress and the projects and challenges are good but I haven't lifted a finger to work on any of them. My Blythe doll that I got for Christmas is still in pieces waiting for me to finish customizing her. I haven't been paying much attention to m ball-jointed dolls, either. My Minifee boy needed his eyelashes replaced but I didn't do it until about ten minutes before the first group showed up for the meet yesterday. I hosted the Michigan BJD group yesterday and had fun but spent the rest of the evening in the recliner. I tend to spend most of my time on my computer browsing message boards, blogs, online shopping venues, and flickr photos. My house is clean so I'm not being a total bum. :P I should probably declare a couple of computer free days and try to get some things done!
Friday, February 17, 2012
Pluggin' Away
I'm making progress on the green gown. I worked on the padstitching for a bit last night then again this afternoon. I got the front interlining finished then stitched on the outer fabric and lining. I took another look at the drawings of Eleanora's burial gown in Patterns of Fashion and noted that the stitching only shows along the waistline, presumably where the skirt was stitched to the bodice. Therefore, I stiched the outer and lining fabrics at the same time (making sure the thread went through the canvas layer) instead of sewing the outer fabric with a running stitch then stitching the lining over it like I did with the red and gold gown.

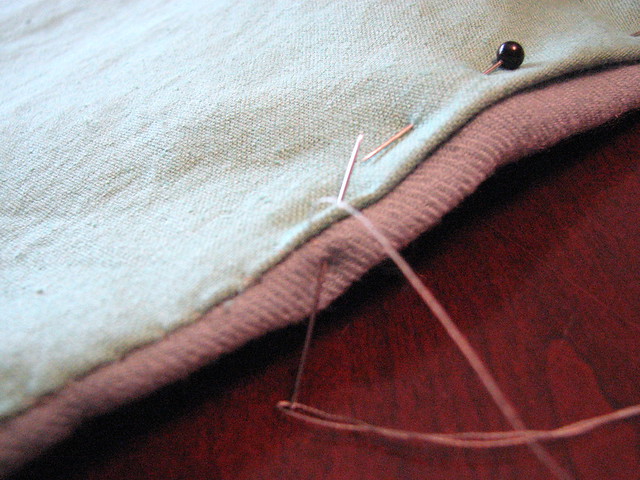

And I finally got a photo that shows the true colors of the fabrics!
And I finally got a photo that shows the true colors of the fabrics!
Crazy Doll Lady
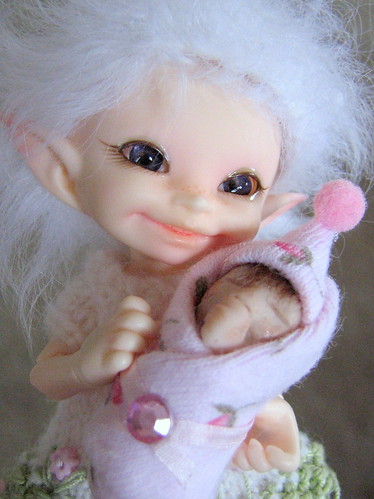
One of the things I was doing during the time that I wasn't blogging was adding to my doll collections. I added more Blythe dolls while a few were sent off to new homes, some vintage dolls have come and gone, and I've gotten more into Asian ball-jointed dolls or BJDs.
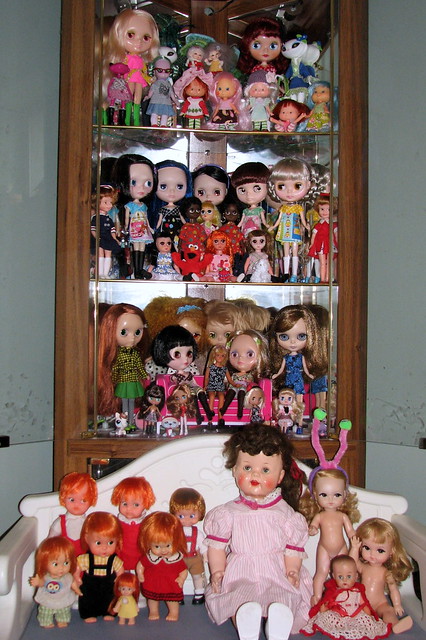
This was the collection at the beginning of 2011:
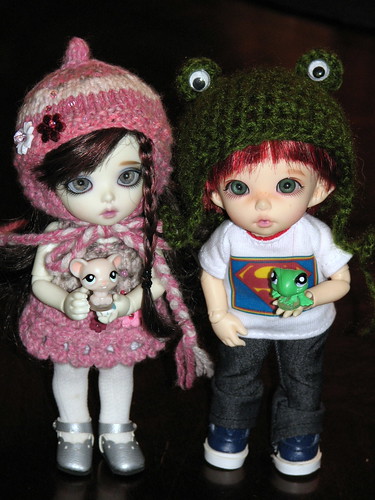
Since then these Blythe dolls have joined the family:
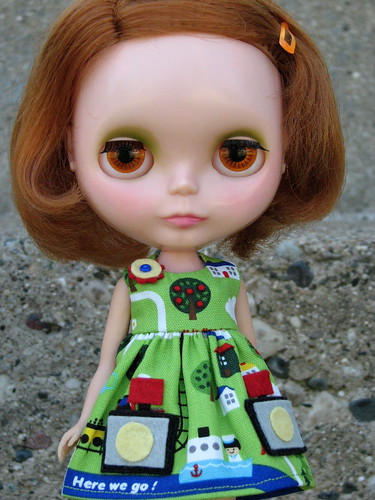

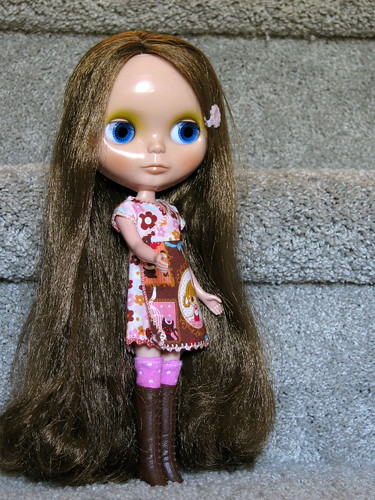

Mango (on the left) arrived for Christmas. I am in the process of custimizing her to be Daphne's twin. :)
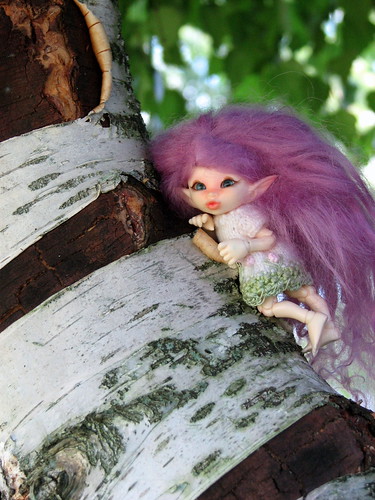
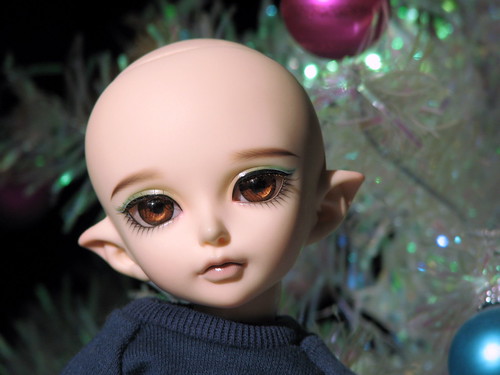
These are the BJDs currently residing here:


I hope you've enjoyed looking at my dolly family as much as i enjoy collecting and customizing them. :)
This was the collection at the beginning of 2011:
Since then these Blythe dolls have joined the family:
Mango (on the left) arrived for Christmas. I am in the process of custimizing her to be Daphne's twin. :)
These are the BJDs currently residing here:
I hope you've enjoyed looking at my dolly family as much as i enjoy collecting and customizing them. :)
Thursday, February 16, 2012
JoAnn's Haul

We (Kim, Julia, and I) went to the grand opening of the new Alpine Ave JoAnn's this morning. I bought trim for the green wool gown as well as navy wool for cut-work or slashed sleeves.
The other fabric will become part of an Ottoman Turkish ensemble. The teal linen will become a long-sleeve enteri coat lined with the purple cotton. The printed cotton will become a short-sleeve enetri lined with the bright print cotton. I saw some pretty embroidered lightweight cotton for the gomleck shirt but didn't buy today because it was 30% off now but it's a better deal to wait until the sale is over and buy with a 50% off coupon. I still need fabric for the salwar pants, too, but nothing jumped out at me today. I'm thinking cotton or linen in a stripe with some chartreuse in it. Ooh! I think throwing a little orange into the mix could be good! Maybe for the sash. :)
Wednesday, February 15, 2012
Resurrecting the Green Wool Gown.

More than two years ago I cut out the bodice and skirt panel for the green wool gown based on based on Georgio Vasari's The Arrival of Leo X in Florence as shown on page 94 of Moda a Firenze and that was as far as I got with it. I've decided that I want to get it finished before the outdoor/camping SCA events start for the season so I pulled it out this afternoon. So far, I have cut the wool and canvas interlining layers for the bodice and begun pad-stitching them together. Tomorrow is the Grand Opening of a new JoAnn Fabrics store in my city so I am hoping to find appropriate trim to purchase with my coupons. I'll be looking for something in a dark mossy green.

Tuesday, February 14, 2012
I got it done!
I actually got it finished with 16 hours to spare! LOL
I got up Friday morning and started working on the hem. I adjusted the dress form so that her waist-to-floor measurment was the same as mine then pinned the hem so it was about an inch off the floor in the front making it easy for me to walk with my hands full or dance without stepping on the hem and just skimming the floor in the back so I didn't have to worry about someone stepping on a train. I had over-estimated the length when I cut the skirt panels to I had several inches of fabric turned under for the hem. Rather than cutting it off I cheated a little- instead of using a separate strip of fabric to face the hem, I turned the hem back on itself to expose about a 1/4" edge then inserted a strip of wool felt about 1 1/2" wide and stitched the hem into place and finished by snipping into the exposed edge about every 1/4" or so.

Outside:

Inside:

Since did the snipped edging at the hem I decided to go back, pick the lining loose, and add it to the neckline as well as adding it to the sleeves. I cut bias strips and sandwiched them between the outer and lining fabrics, stitched in place with a tiny running stitch, then snipped/clipped the edging. I am so glad that I took the time to do that because I really like the effect!

Since I knew that I wasn't even going to attempt to get stitched lacing eyelets done before Saturday, I went ahead and whip-stitched the right side-back opening closed. Then, to fake a laced look, I threaded a large eye needle with ribbon and sewed it over the seam using plier to pull the needle through all of the layers of fabric. I had stitched brass rings inside the edge of the left side opening for lacing but didn't like the way it pulled and exposed the lining. Since sewing the ribbon worked so well on the right side, I went ahead and sewed a lacing ribbon throught the fabric on the left. I did put the stitching through the brass rings just incase it was too much strain on the fabric. It worked like a charm! One of these days I will do the stitched eyelets but I'm in no hurry. ;)

The photos that I asked a friend to take at Val Day of me in my dress didn't turn out so I had to resort to mirror shots after I got home. The dress held up really well with just a tiny bit of creasing at the waist. Oh, I forgot to mention that I didn't need to wear my corset! And, yes, I do have blue hair.


Thursday, February 09, 2012
It's starting to look like a dress! :)


It took me two-and-a half-days to construct the completely hand-sewn bodice. I ended up using only one layer of canvas since I will be wearing my corset under it. (A corset is the only way for me to get a smooth line without the reduction surgery that I am considering. ;) )I pad-stitched the canvas to the wool layer, trimmed away the seam allowances, sewed on the outer fabric by stab-stitching through all layers, then slip-stitched in the lining. I spent yesterday morning on the straps (same construction). I cut my straps separately from the bodice front because I always have to fiddle with the placement and with this busy pattern on the fabric I don't feel it's that noticeable. I whip-stitched the straps at the shoulders and tucked the ends between the interlining and lining in the front stitching them to the canvas interlining.

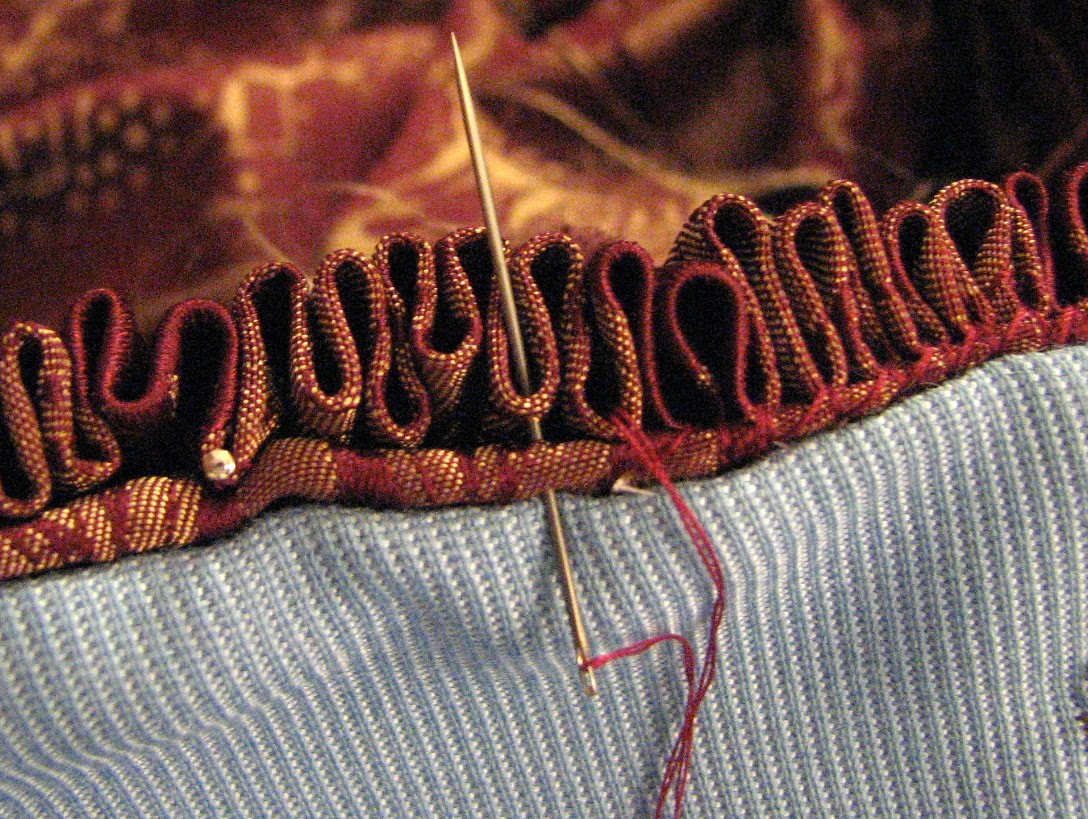
Yesterday evening was devoted to stitching the cartridge pleated skirt to the bodice. Some people seem to be intimidated by cartridge pleating by I find it quite easy. I fold over the top edge of the fabric a few inches then, using heavy-duty thread such as buttonhole thread or "jeans" thread so it doesn't break on you!, I make two parallel rows of running stitches. I DO NOT measure and mark anything! I eyeball the measurements and make my stitches about a thumb-width long with the first row about a thumb-width from the edge and the second row about a thumb width below that. The important part (that I forgot to take a photo of!) is to make sure that the stitches match in both rows meaning that the second row of stitches go in and out directly below the first row so it will gather neatly when you pull the threads. After you've gathered your skirt into nice pretty pleats that look like Christmas ribbon candy :D, pin it to the bodice with right sides together. Depending on your preference and the style of the gown, the pleats can be evenly distributed or tighter/fuller in the back and looser in the front. I use a doubled thread to stitch the skirt to the bodice by taking two or three stitches through the bodice edge, making sure to catch the interlining,and through the bottom (as you look at the photo) of each pleat. I like my skirts not gathered at all in the very front because a) I don't want extra fullness over my tummy and b) it's easier to stitch to the pointed bodice front that way! I leave my skirt smooth from the spots on each side where the bodice starts to curve down toward the center point. I leave the skirt fabric straight across the inside of the bodice and slip-stitch the bodice point to the skirt fabric.
On a side note: Italian gowns are generally one piece the the skirt sewn directly to the bodice but for an Elizabethan gown the skirt could be stitched to a waistband and worn with a separate bodice with tabs or skirting to cover any gaps.
Still to do before Saturday: stitch bodice point to skirt, face side slit in skirt, purchase and sew on more brass lacing rings (stitched eyelets will have to wait 'til after val day), hem sleeves, decide whether or not to use decorative buttons on the sleeve heads, and hem the skirt.
Monday, February 06, 2012
A New Dress Diary!


Oh, my! It's been nearly a year since I posted anything here. :embarrassed:
I am resurrecting my long dormant blog to record the making of a new Florentine gown in the style of the 1550's-60's. I haven't made myself any new garb in ages, had a two-and-a-half year old bolt of fabric staring me in the face, and the St. Valentines's Day Massacre is this coming weekend.
I am trying some new-to-me things for this gown:
1. I like the more formal look of a side-back laced gown but enjoy the ability to dress myself that I get with a side-laced gown so I decided to split the difference. The back piece of the bodice is cut pretty much straight instead of angled toward the center so that I can (hopefully) tighten the laces myself.
2. I will be pad stitching a layer of felted wool to two layers of canvas for the bodice interlining. I will not be using any type of boning to stiffen the bodice.
3. I will be adding a strip of felted wool at the hem of the skirt to help stiffen it and keep the fabric from attacking my legs as I walk!
Subscribe to:
Posts (Atom)
