

It took me two-and-a half-days to construct the completely hand-sewn bodice. I ended up using only one layer of canvas since I will be wearing my corset under it. (A corset is the only way for me to get a smooth line without the reduction surgery that I am considering. ;) )I pad-stitched the canvas to the wool layer, trimmed away the seam allowances, sewed on the outer fabric by stab-stitching through all layers, then slip-stitched in the lining. I spent yesterday morning on the straps (same construction). I cut my straps separately from the bodice front because I always have to fiddle with the placement and with this busy pattern on the fabric I don't feel it's that noticeable. I whip-stitched the straps at the shoulders and tucked the ends between the interlining and lining in the front stitching them to the canvas interlining.

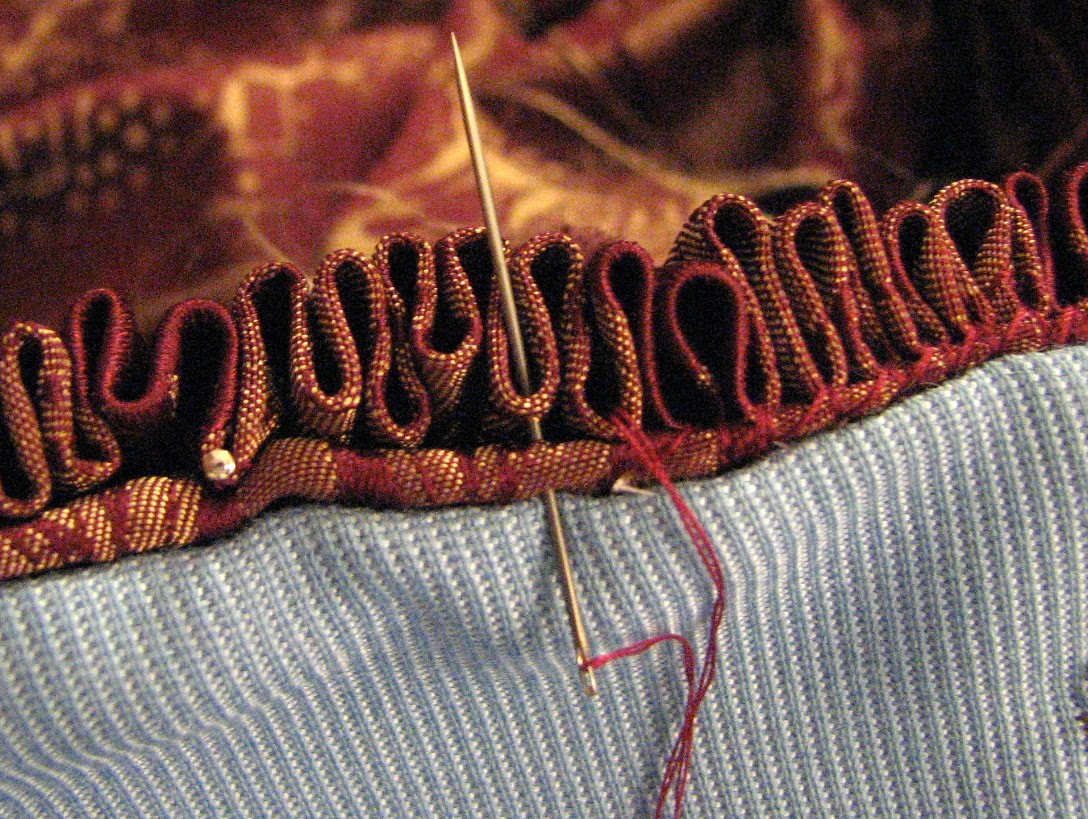
Yesterday evening was devoted to stitching the cartridge pleated skirt to the bodice. Some people seem to be intimidated by cartridge pleating by I find it quite easy. I fold over the top edge of the fabric a few inches then, using heavy-duty thread such as buttonhole thread or "jeans" thread so it doesn't break on you!, I make two parallel rows of running stitches. I DO NOT measure and mark anything! I eyeball the measurements and make my stitches about a thumb-width long with the first row about a thumb-width from the edge and the second row about a thumb width below that. The important part (that I forgot to take a photo of!) is to make sure that the stitches match in both rows meaning that the second row of stitches go in and out directly below the first row so it will gather neatly when you pull the threads. After you've gathered your skirt into nice pretty pleats that look like Christmas ribbon candy :D, pin it to the bodice with right sides together. Depending on your preference and the style of the gown, the pleats can be evenly distributed or tighter/fuller in the back and looser in the front. I use a doubled thread to stitch the skirt to the bodice by taking two or three stitches through the bodice edge, making sure to catch the interlining,and through the bottom (as you look at the photo) of each pleat. I like my skirts not gathered at all in the very front because a) I don't want extra fullness over my tummy and b) it's easier to stitch to the pointed bodice front that way! I leave my skirt smooth from the spots on each side where the bodice starts to curve down toward the center point. I leave the skirt fabric straight across the inside of the bodice and slip-stitch the bodice point to the skirt fabric.
On a side note: Italian gowns are generally one piece the the skirt sewn directly to the bodice but for an Elizabethan gown the skirt could be stitched to a waistband and worn with a separate bodice with tabs or skirting to cover any gaps.
Still to do before Saturday: stitch bodice point to skirt, face side slit in skirt, purchase and sew on more brass lacing rings (stitched eyelets will have to wait 'til after val day), hem sleeves, decide whether or not to use decorative buttons on the sleeve heads, and hem the skirt.

4 comments:
such beautiful work!
there is an exhibition on costume at Ringling this month, but it's 17th c, let me know if you want pix
Alecia- Photos would be awesome!
Soooooo cool! You have such a gift for that! Love that you've updated your blog Cindy!
Post a Comment